AWS Lambda (Part 2) - Local Serverless development with AWS SAM
This is the second (and final) part to the Getting Started with AWS Lambda tutorial.
Part one is here.
AWS Serverless Application Model (SAM) Overview
As easy as setting up and triggering a simple Lambda function is, it might not be very useful for a developer who want to develop several API endpoints as Lambda functions in a CRUD-like API. This will require some kind of development environment, and this is where the AWS Serverless Application Model comes into play.
There are several benefits highlighted on the page when visiting the URL above, but what I want to point out the two most immediate benefits, in my opinion, when developing and deploying through the AWS SAM CLI.
The AWS SAM has a CLI that not only provides a local development environment, but also makes the process of packaging and deploying AWS Lambda functions to the AWS cloud infrastructure very simple and straight forward.
What we did before from the AWS console, which was to create a Lambda function, add an API Gateway as a Trigger for the functions and add the required Roles and Permissions, can very easily be done with the SAM CLI.
There are, however, a few prerequisites for getting started with AWS SAM which I will discuss next.
Prerequisites
AWS Credentials
These are a key pair (access key ID and secret access key) which can be obtained from the AWS console, either by creating a new IAM user or using the root user.
For information about access key IDs and secret access keys, see Managing Access Keys for IAM Users.
Because the root user is essentially an administrator with full access to services and resources, we recommend that you instead create an IAM user with only those permissions needed to perform the required tasks. Then, for your credentials, you can use an access key that is associated with that user. For details, see Creating an IAM User in Your AWS Account in the IAM User Guide.
Create a new User
For more reasons than the warning from AWS above, I prefer to create a new user that only has programmatic, least privilege access, for the purpose of working AWS Lambda using access keys.
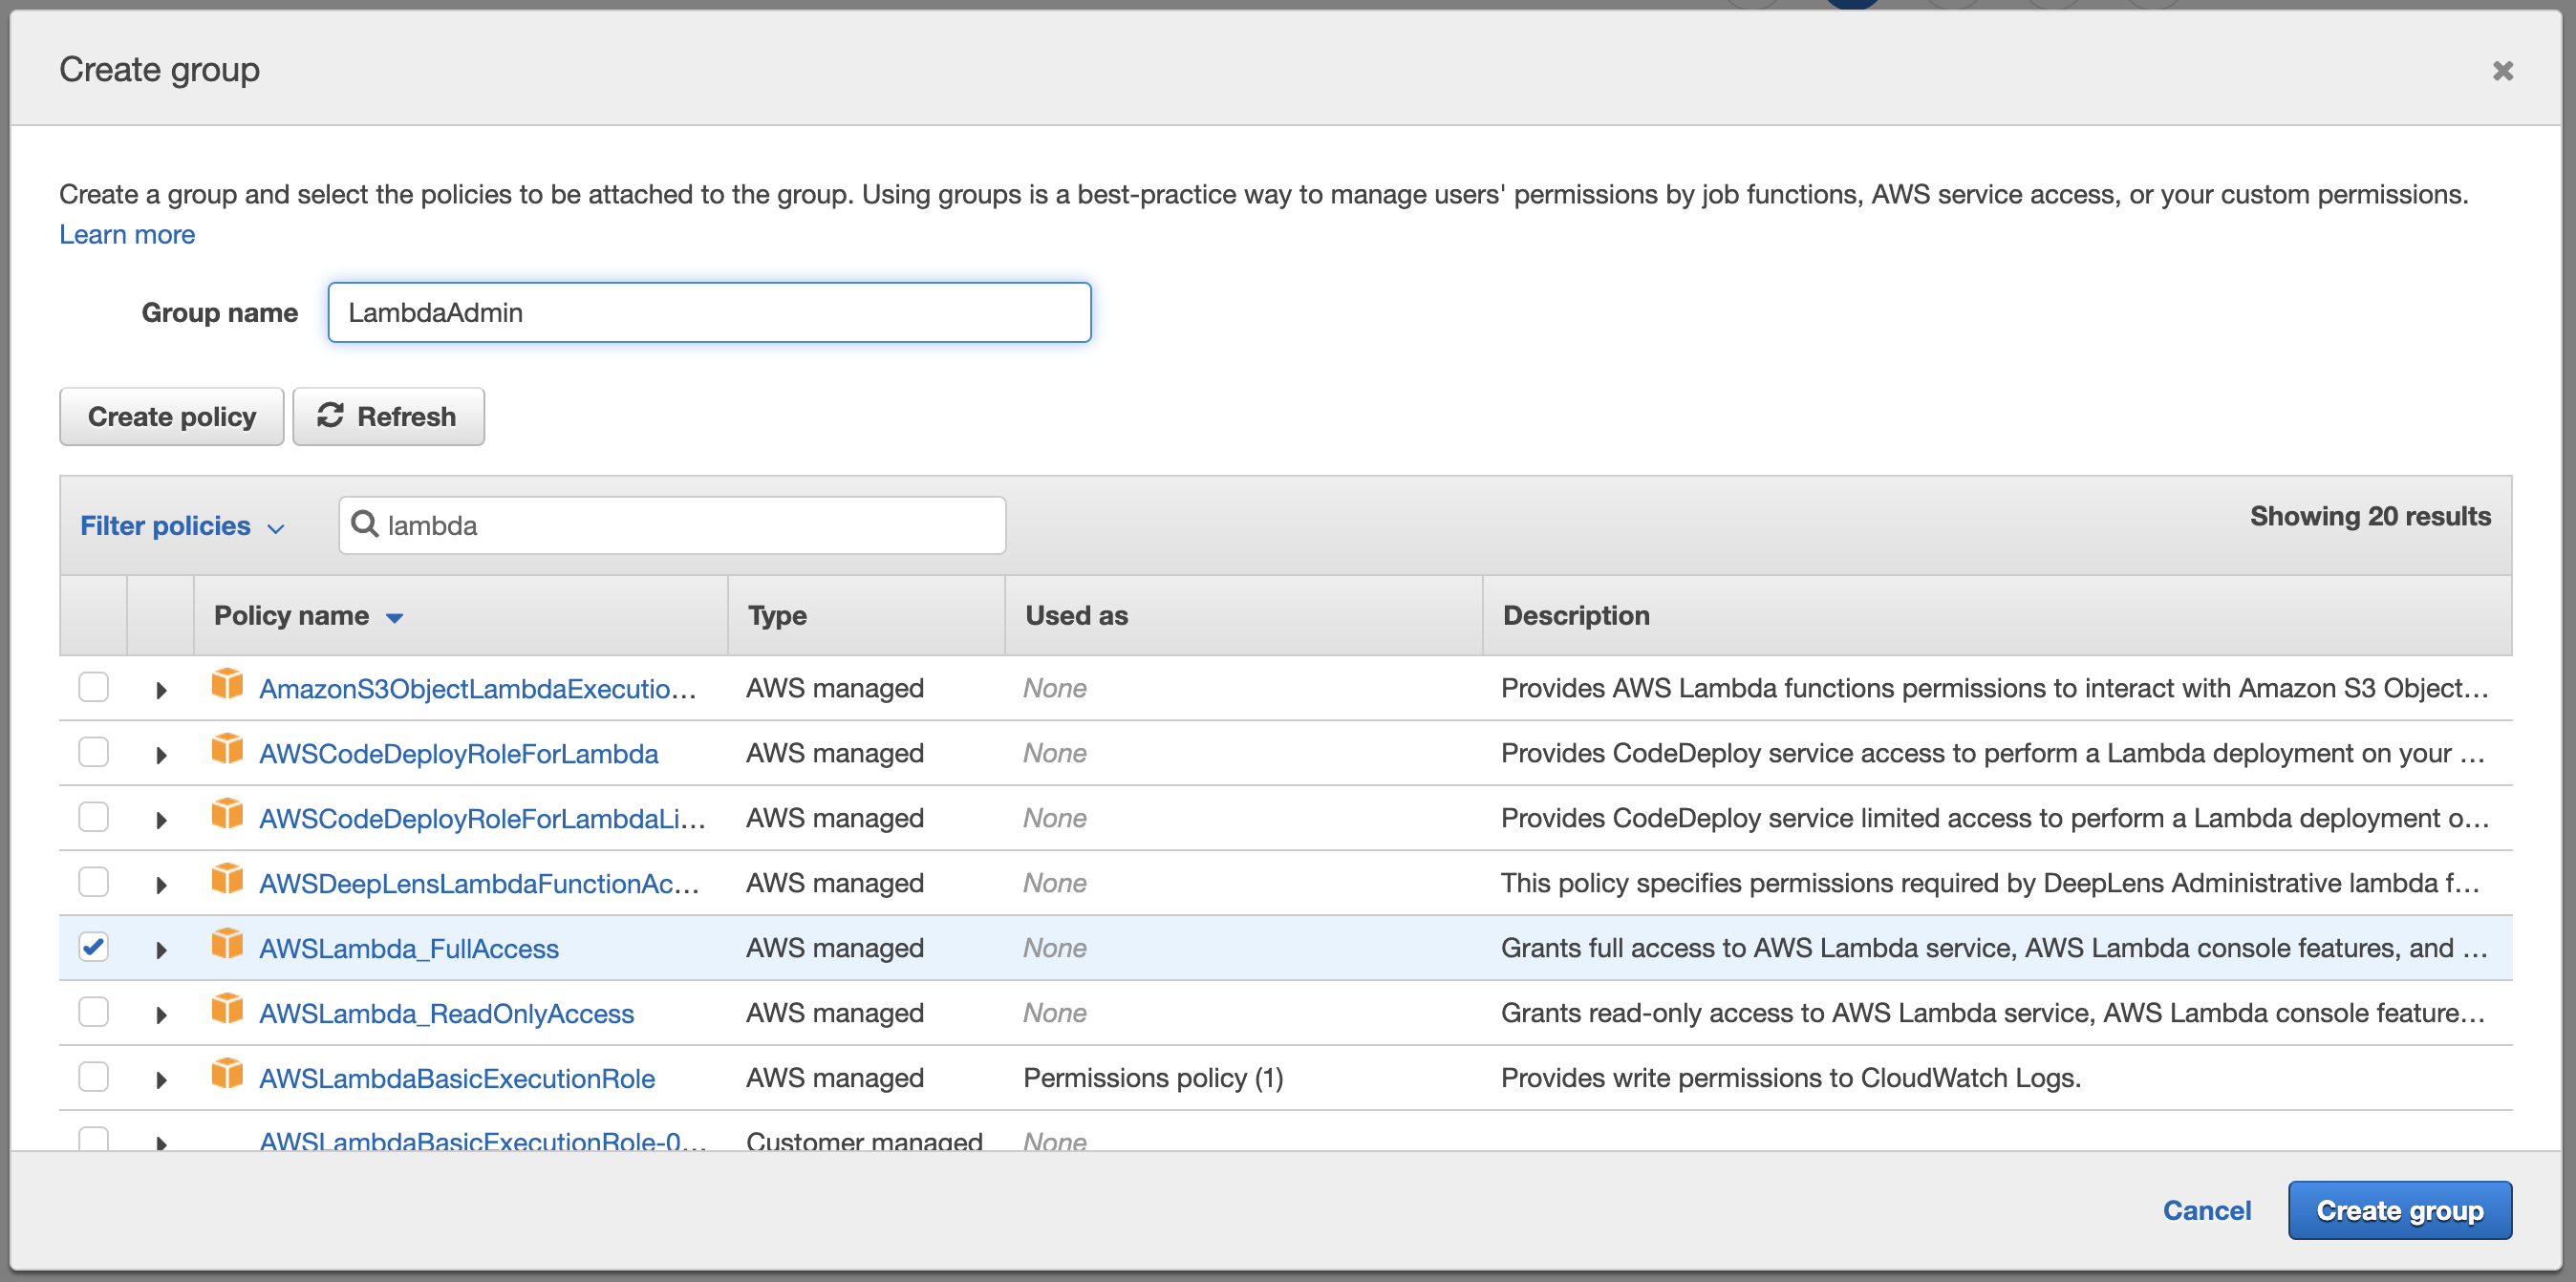
- From the IAM page add a new user.

- I created a group named LambdaAdmin, and attached the AWSLambda_FullAccess permission to it.
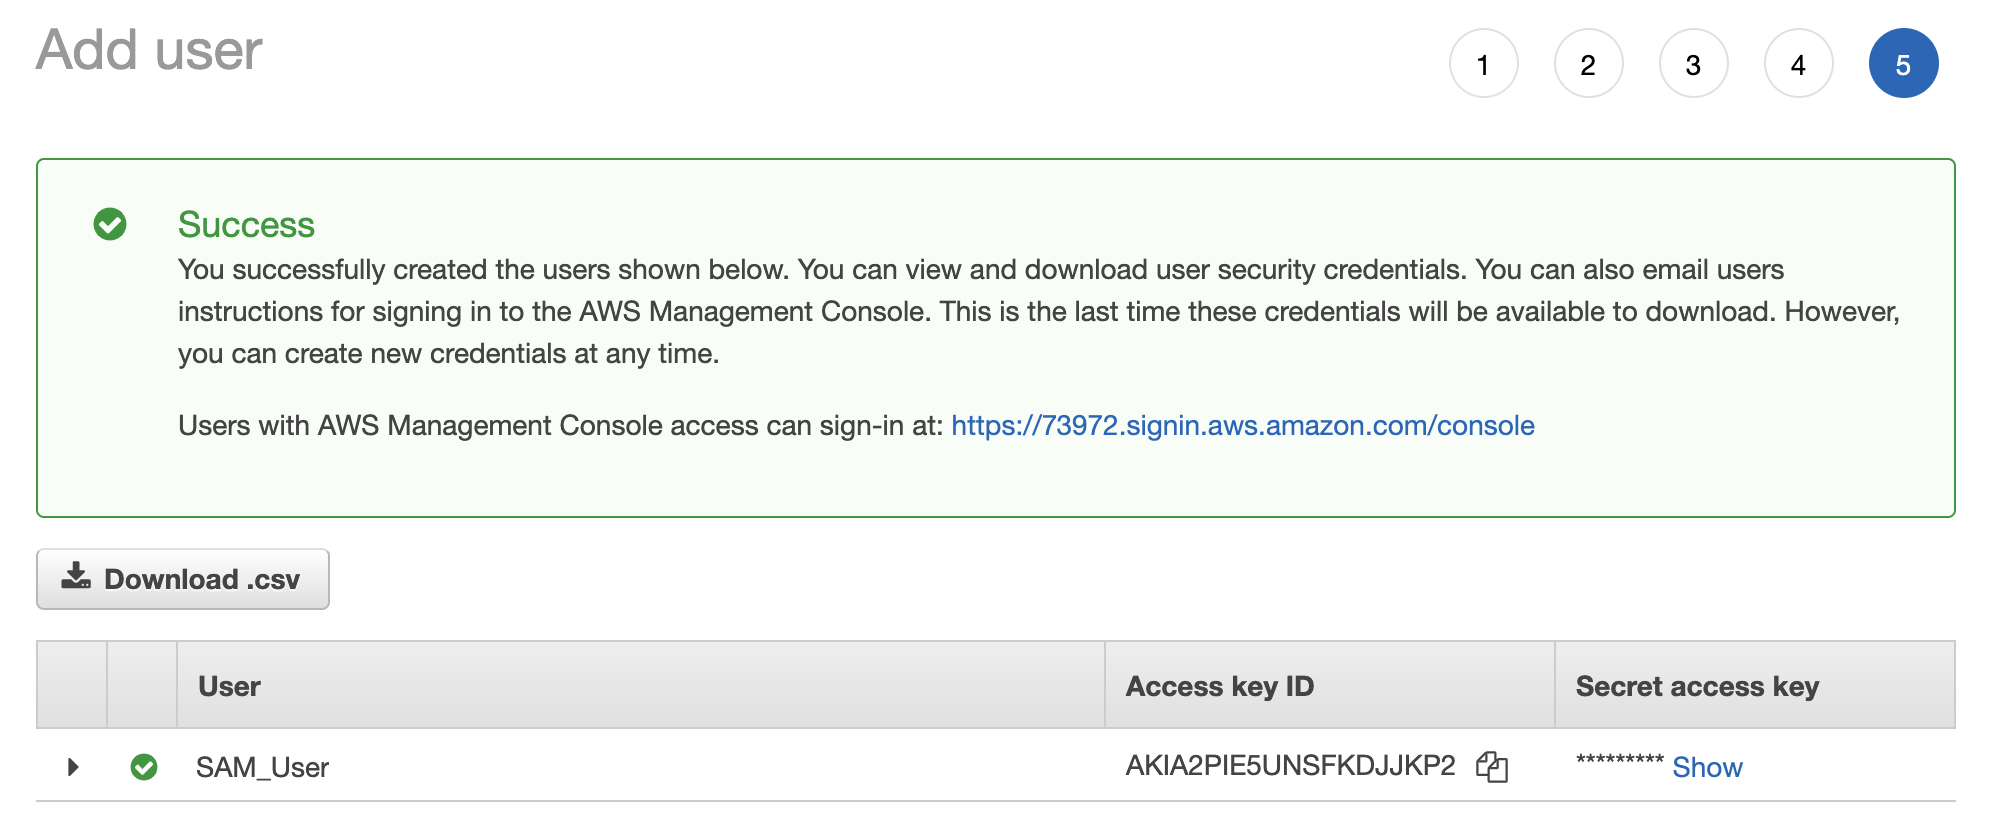
- I step through the remaining steps, keeping the defaults, until I reach the page showing the Access Key pair.
Set environment variables
For the purposes of this post, I want to keep it simple so I am going to make use of environment variables to set AWS Credentials. This is not necessarily the best option, and there are many, but should get us started.
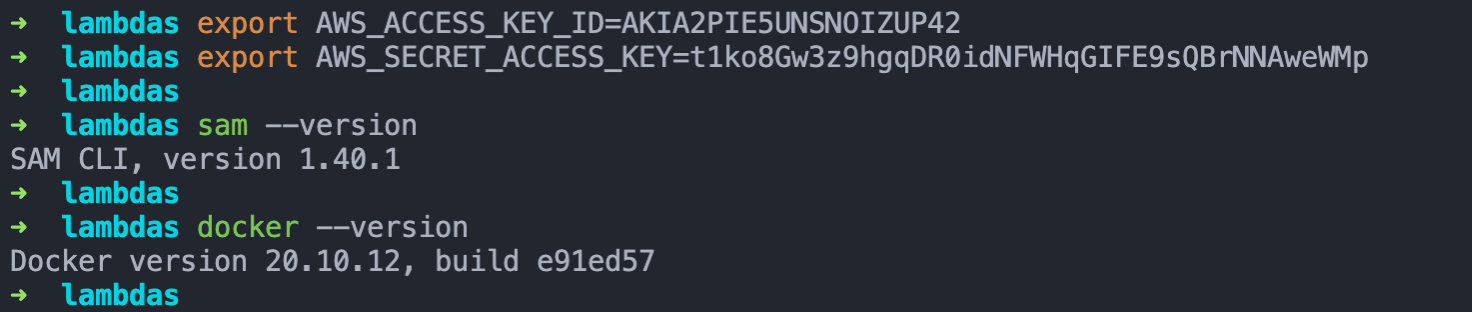
Using the Access Key and the Secret Access Key set the credentials as follows:
To set these variables on Linux or macOS, use the export command from a terminal window:
export AWS_ACCESS_KEY_ID=<your_access_key_id>
export AWS_SECRET_ACCESS_KEY=<your_secret_access_key>
To set these variables on Windows, use the set command from a terminal window:
set AWS_ACCESS_KEY_ID=<your_access_key_id>
set AWS_SECRET_ACCESS_KEY=<your_secret_access_key>For more information see the Setting up AWS credentials section from the AWS SAM documentation.
AWS SAM CLI
This is the main component and the reason we are here. Fortunately, the installation is fairly well documented for each supported Operating System, so I will just link to these. Once you’ve installed the AWS SAM CLI, you can progress to the next step.
- Installing the AWS SAM CLI on Linux
- Installing the AWS SAM CLI on Windows
- Installing the AWS SAM CLI on macOS
Docker
Docker is a prerequisite for testing your application locally, and again, the steps to get started are very well documented for each Operating System type. You can follow along at https://docs.docker.com/get-docker/.
Verify Prerequisite
Getting to this point was probably the hardest part, and hopefully you would have been able to set the environment variable and install AWS SAM CLI as well as Docker.
Hello World with SAM
With the prerequisites out of the way, let’s get started with a simple example Hello World serverless application.
sam init
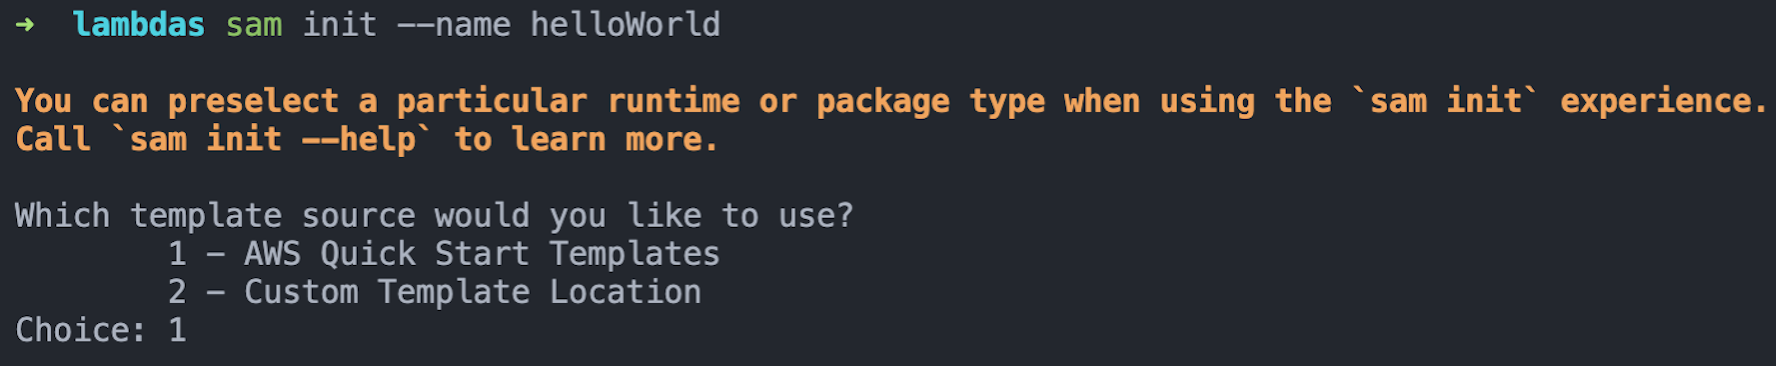
Running sam init and specifying a --name will guide us to create a serverless application.
-
From the “Which template source would you like to use?” choose option 1 from the list of starter templates.
-
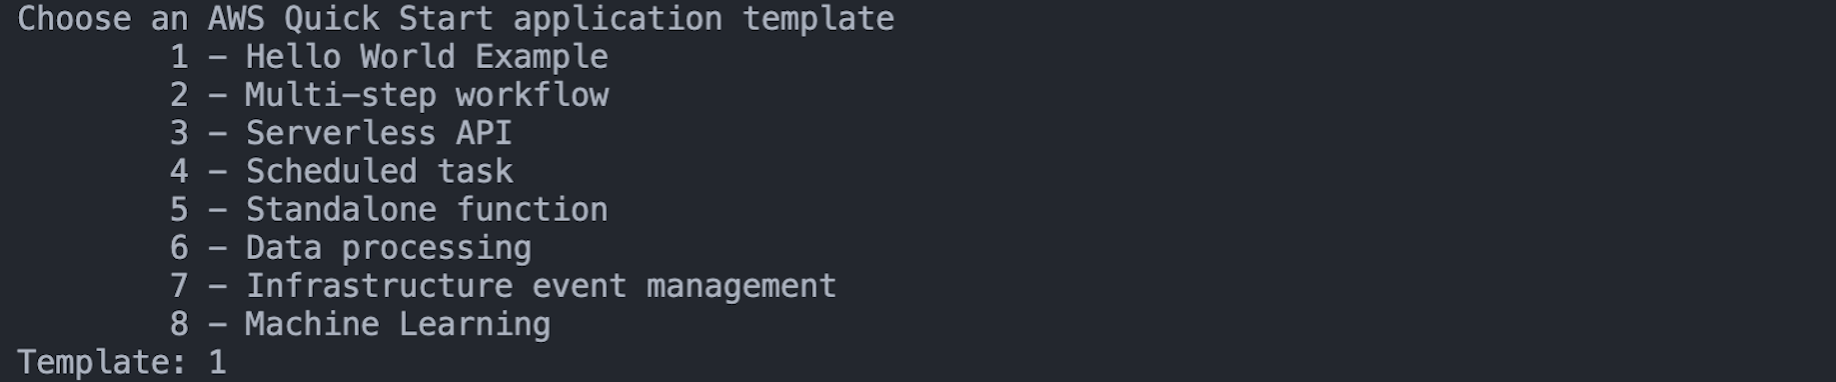
From the “Choose an AWS Quick Start application template”, select option 1 to choose the “Hello World Example” template.
-
Type “y” when prompted “Use the most popular runtime and package type?”.

-
This will clone and and set up the example Hello World template.

Once complete, the example serverless application with the following file structure will have been created:
➜  helloWorld tree
.
├── README.md
├── __init__.py
├── events
│   └── event.json
├── hello_world
│   ├── __init__.py
│   ├── app.py
│   └── requirements.txt
├── template.yaml
└── tests
    ├── __init__.py
    ├── integration
    │   ├── __init__.py
    │   └── test_api_gateway.py
    ├── requirements.txt
    └── unit
        ├── __init__.py
        └── test_handler.py

5 directories, 13 files
The Lambda Function
Again, I really want to only look at the most basic things to gain a better understanding of how to run a Lambda function locally as well as to deploy it to the AWS cloud.
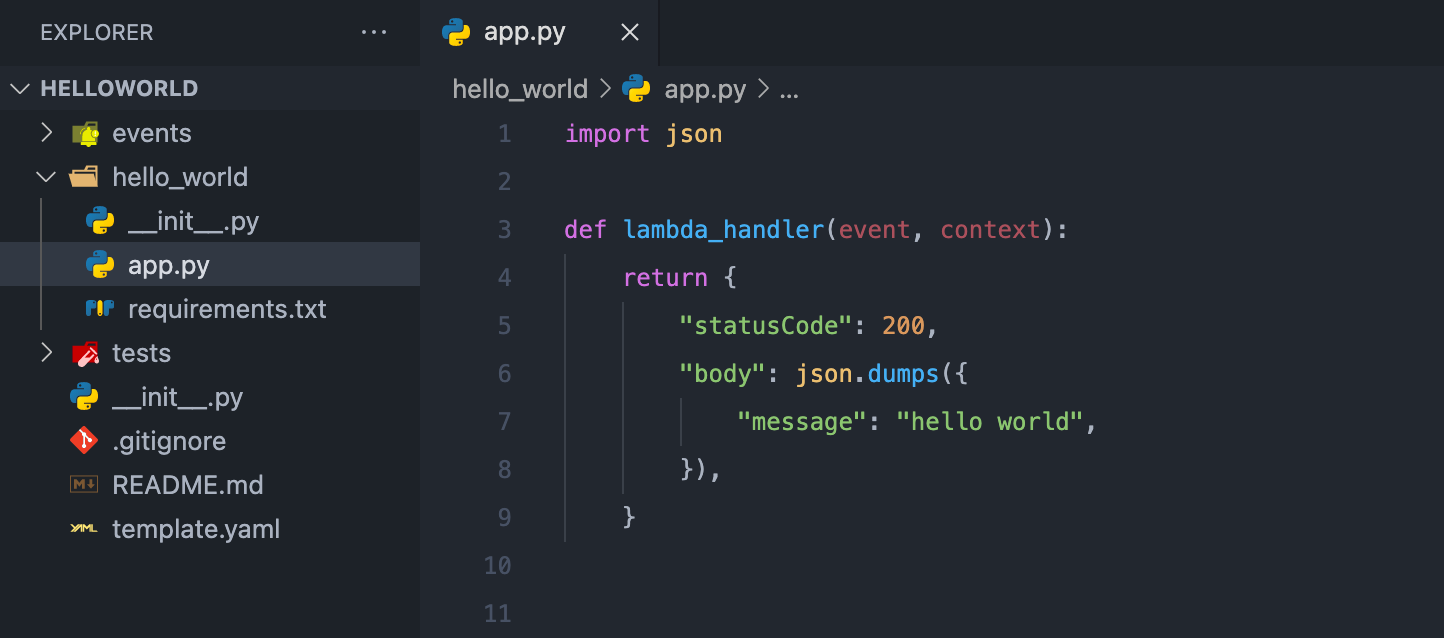
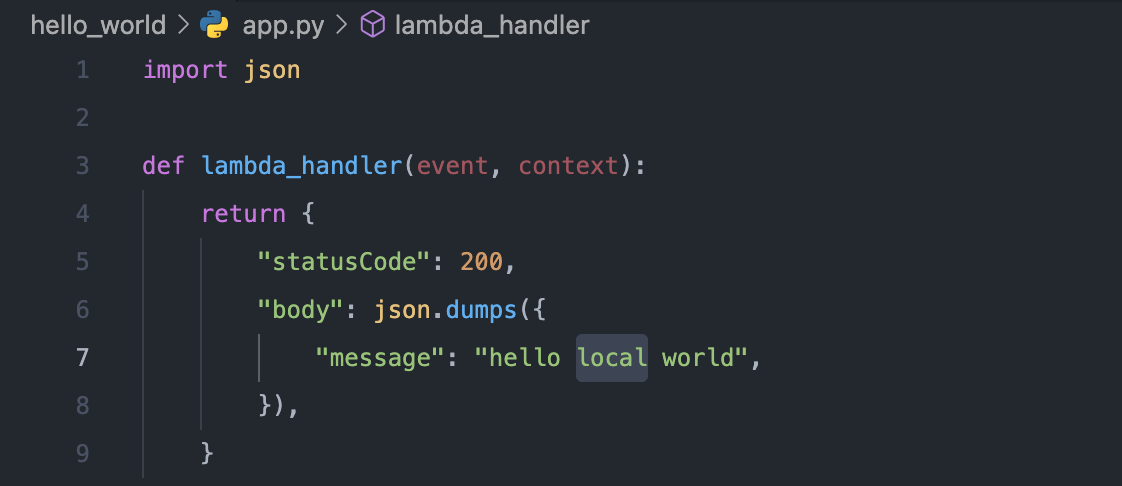
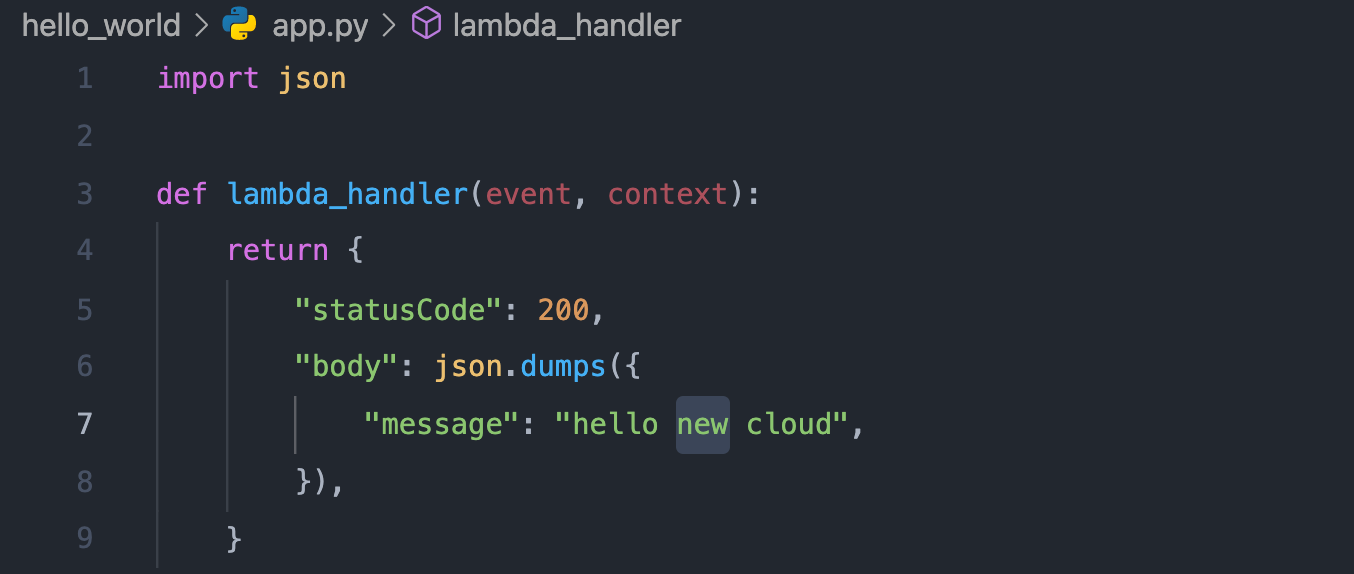
So most of these files can be ignored for now and you can familiarise yourself with these at a later stage, but for the most basic understanding let’s take a look at the hello_world/app.py file.
If we ignore / remove all the comments from the app.py file just for a moment, it should feel familiar, and is pretty much what we saw when we created the Lambda function from the AWS console in part one, except for the messages key in the json.dumps function.
Running locally
The AWS SAM CLI has an option to run the Lambda functions through “emulating” the AWS cloud environment in order to test the Lambda locally. This is why we need Docker, as it will be used to run these images locally.
-
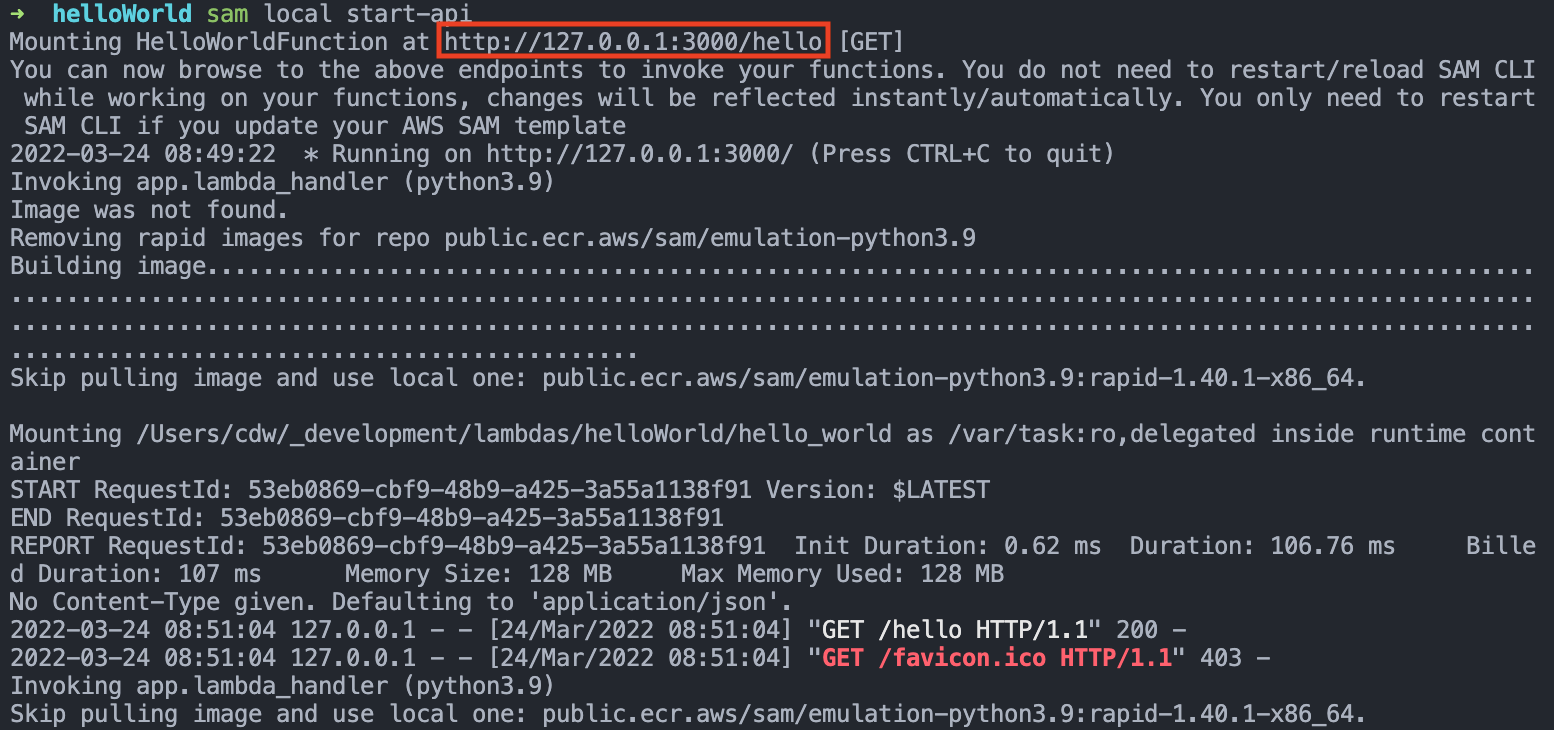
So, in order to start the local environment, run the sam local
start-apicommand.
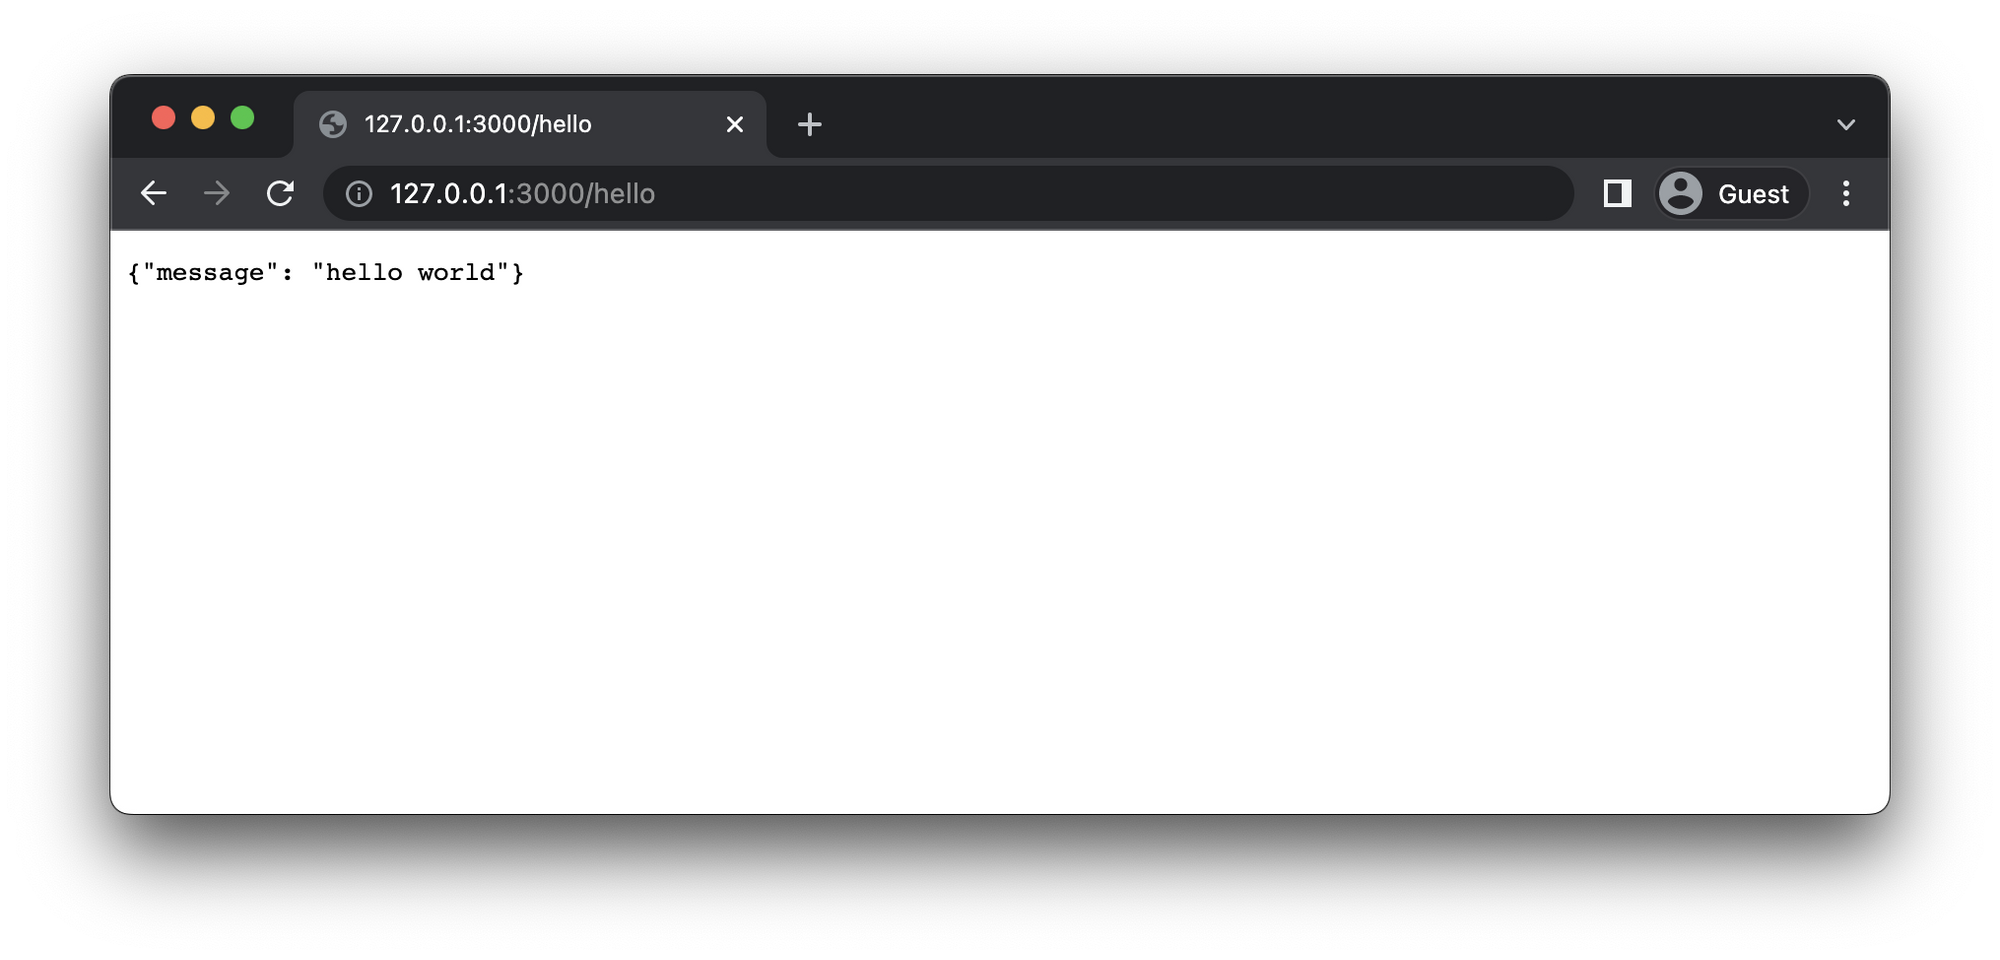
Running this command will firstly output which local URL the function can be triggered from, similar to the URL we got when we created the API Gateway through the AWS Console in part one. -
When navigating to this URL for the first time, you will notice that the image needs to be built.
-
Once the build is complete, you should see the output in your browser from the Lambda function.
Local Changes
This is the inevitable part, and one of the main reason why you would want to develop locally; make a change, test it and validate the desired outcome before deploying the changes.
-
Simply make a change to the function and save.
-
Navigate to the browser and refresh the page.
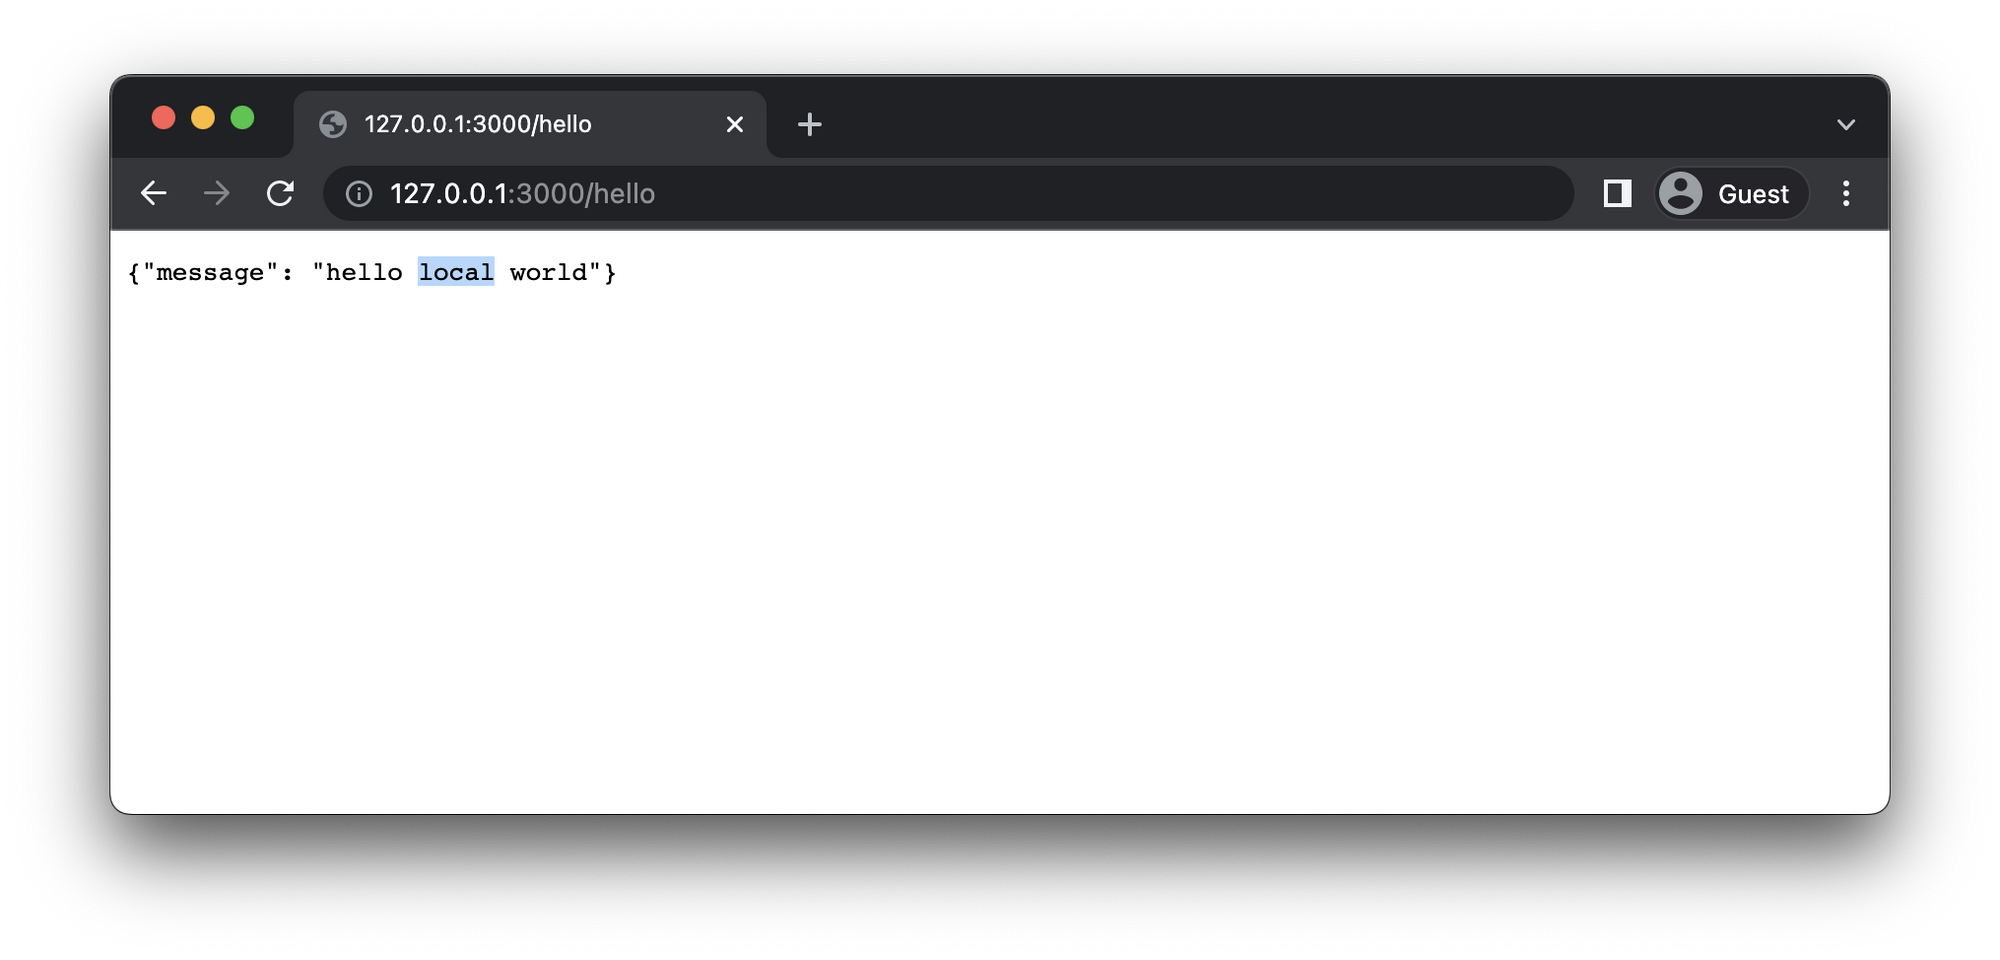
And there you have it, local development of Lambda functions!
Deploy to AWS Cloud
We’re almost done, but we need to get this thing on the Internet right?
The AWS SAM CLI is really a one-stop shop when it comes to building serverless applications and can also help us to deploy this sample hello world serverless application to the AWS Cloud.
This is similar to what we did before when creating and running a serverless application locally.
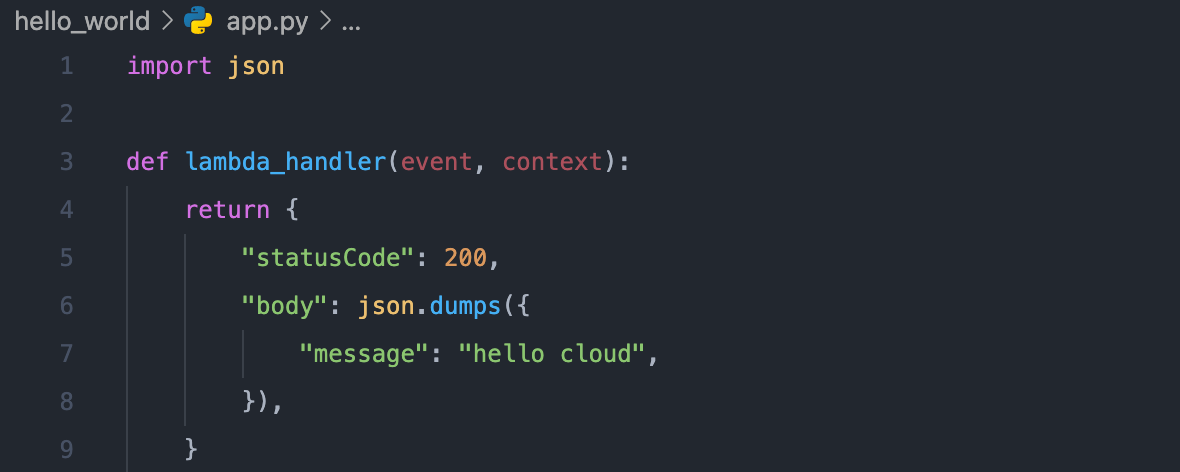
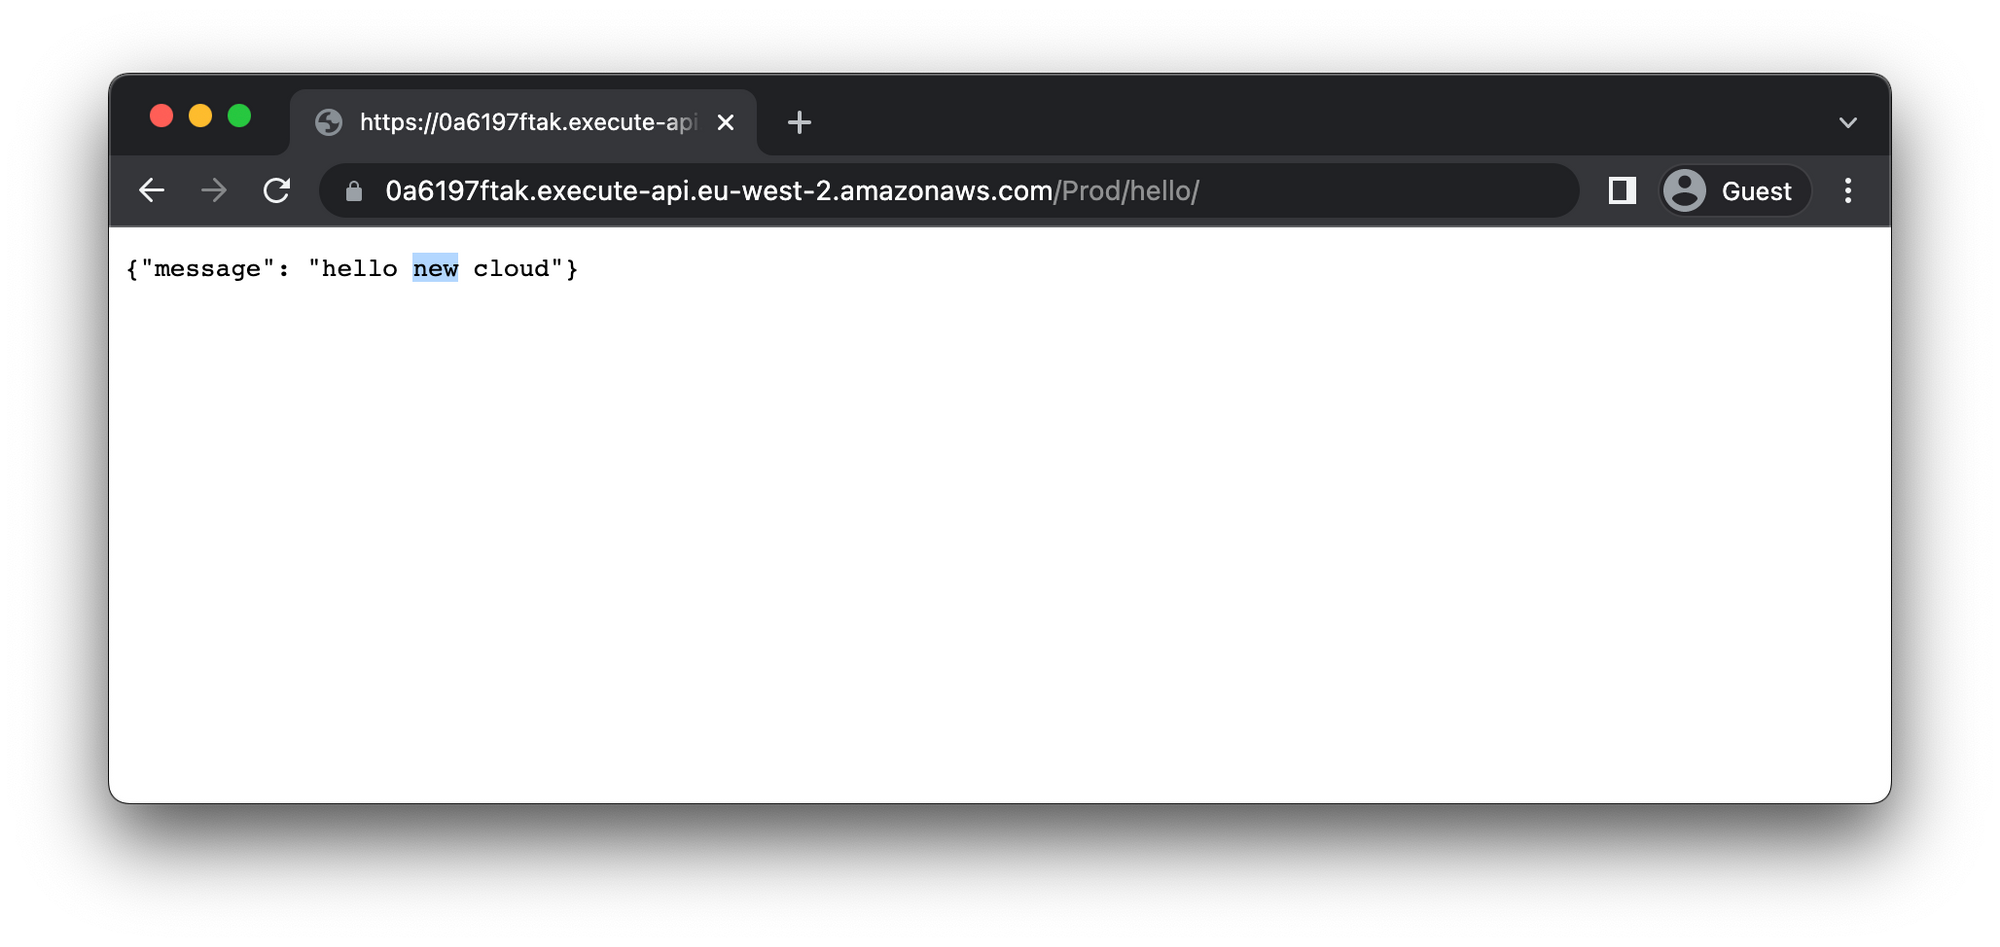
But first, let’s update the message before deploying the serverless application just to demonstrate the simplicity. I am going with the message hello cloud, feel free to be more creative.
sam deploy
Now, I don’t want to go to deep into it, but AWS SAM heavily relies on another AWS service called AWS CloudFormation, and if you continue down this AWS Lambda journey you will definitely have to learn a lot more about AWS CloudFormation; it will be worth it.
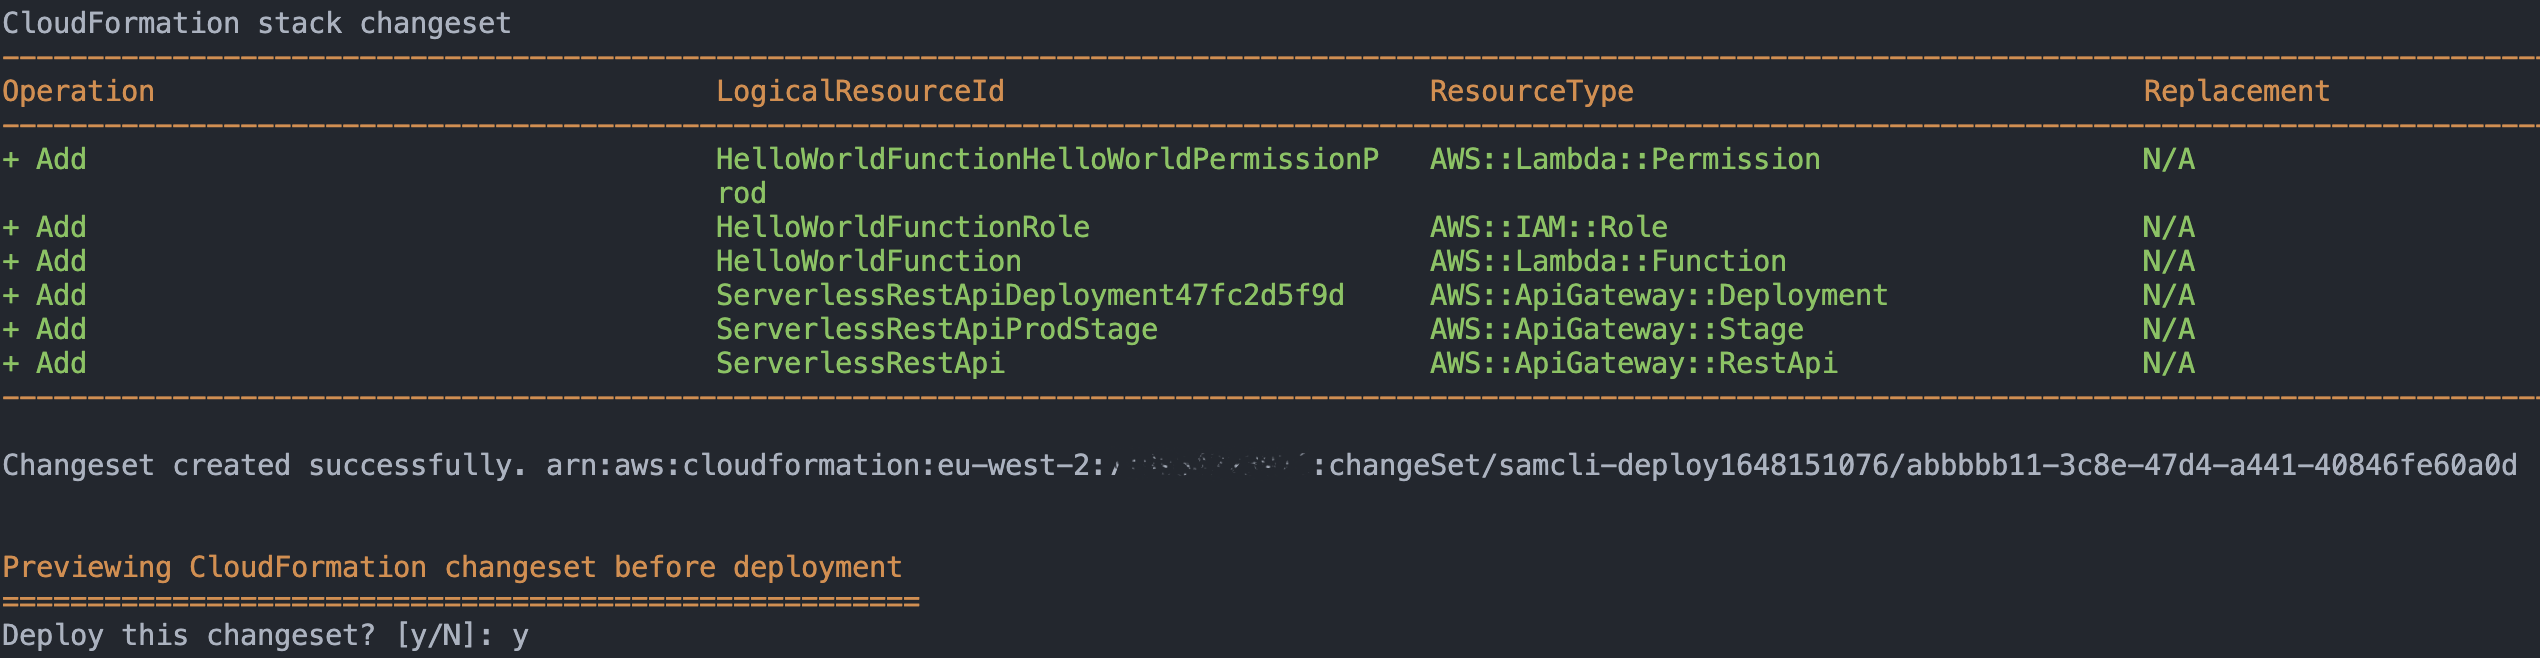
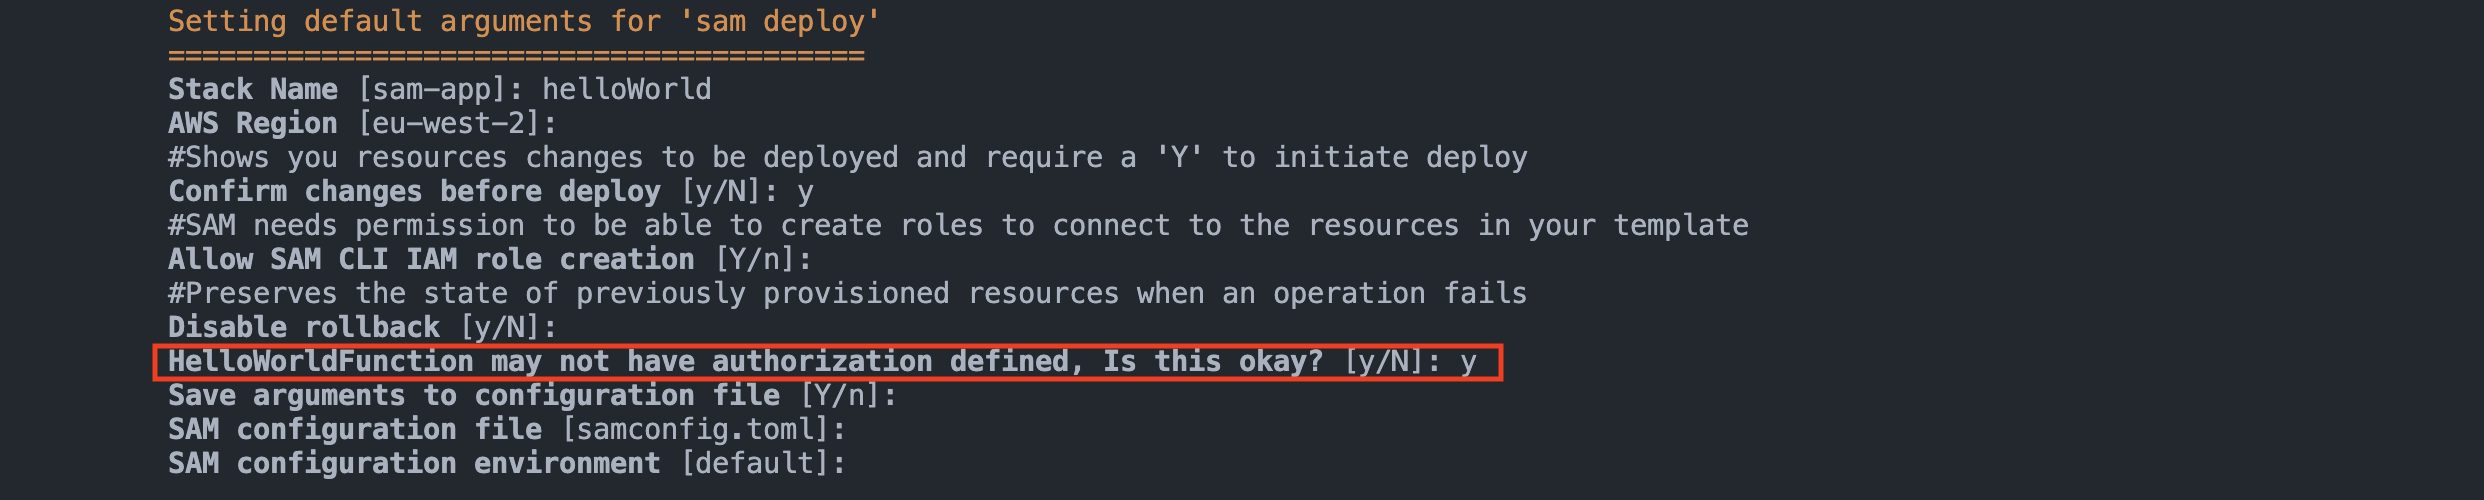
To initiate the deployment, let’s make use of the sam deploy --guided command. The --guided flag will guide us through the deployment with guided prompts.
-
If you select yes [y] for the “Confirm changes before deploy [y/N]:” option you will have to confirm it later as shown below.
-
AWS wants you to specifically confirm that your serverless application does not make use of any authentication, so make sure to confirm this at the “HelloWorldFunction may not have authorization defined. Is this okay? [y/N]:” question.
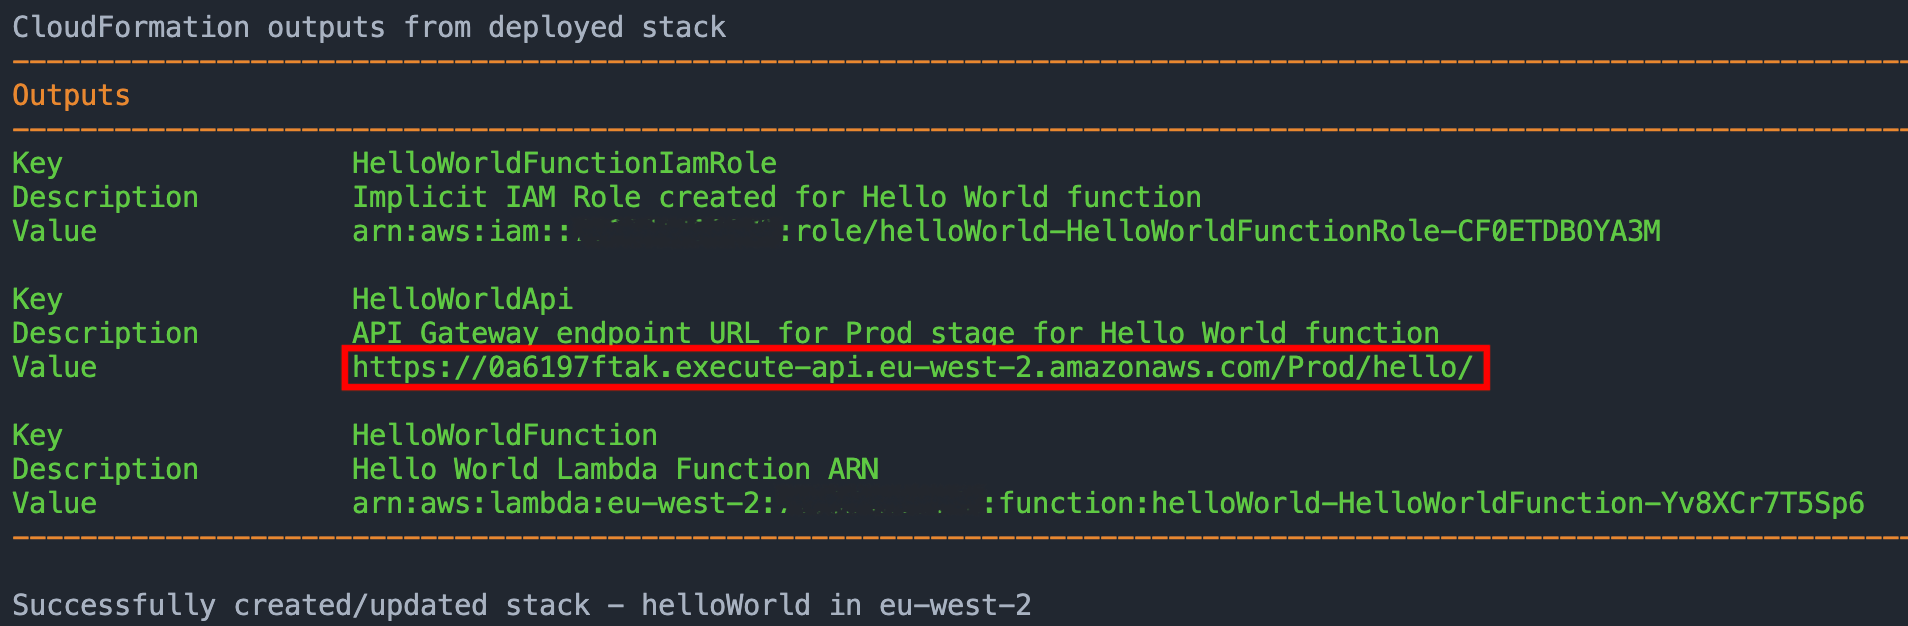
Here is the full workflow of the deploy:
Once the serverless application is deployed you will be able to access it at the URL which is presented in the output at the end of the deployment process.

Deploy Changes
Deploying updates to the Lambda function could not be easier. Make your changes and rerun the sam deploy command. You’ll notice that there is no need to specify the --guided flag as we previously saved the samconfig.toml file which essentially remembers the state.
After the deployment is complete the changes will be reflected after refreshing the browser (which loads the changes).
AWS Cloud Resources
The AWS resources that we saw when we created the Lambda function and added the API Gateway Trigger manually during part one were created automatically by AWS SAM CLI. Feel free to navigate to the AWS console and review the AWS services; Lambda, API Gateway, IAM.
In addition to these resources, AWS SAM CLI creates a few other resources as well.
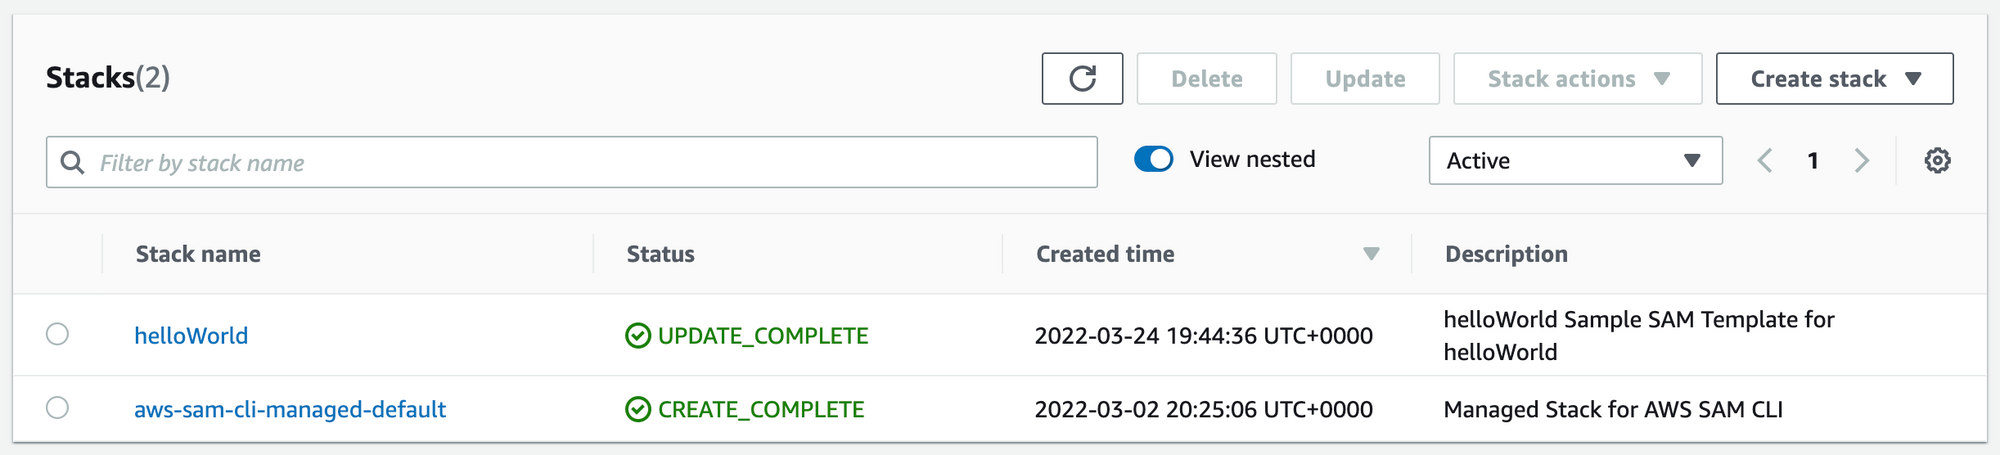
AWS CloudFormation
AWS SAM CLI adds some additional resources; take a look at the AWS CloudFormation console, you will notice there are some stacks. These are the CloudFormation stacks which SAM creates to track the state of the serverless application.
AWS CloudFormation is a topic and a service which requires a great deal to learn and I suggest spending time on this, but it is out of the scope of this tutorial which is getting started with AWS Lambda and local development using AWS SAM.
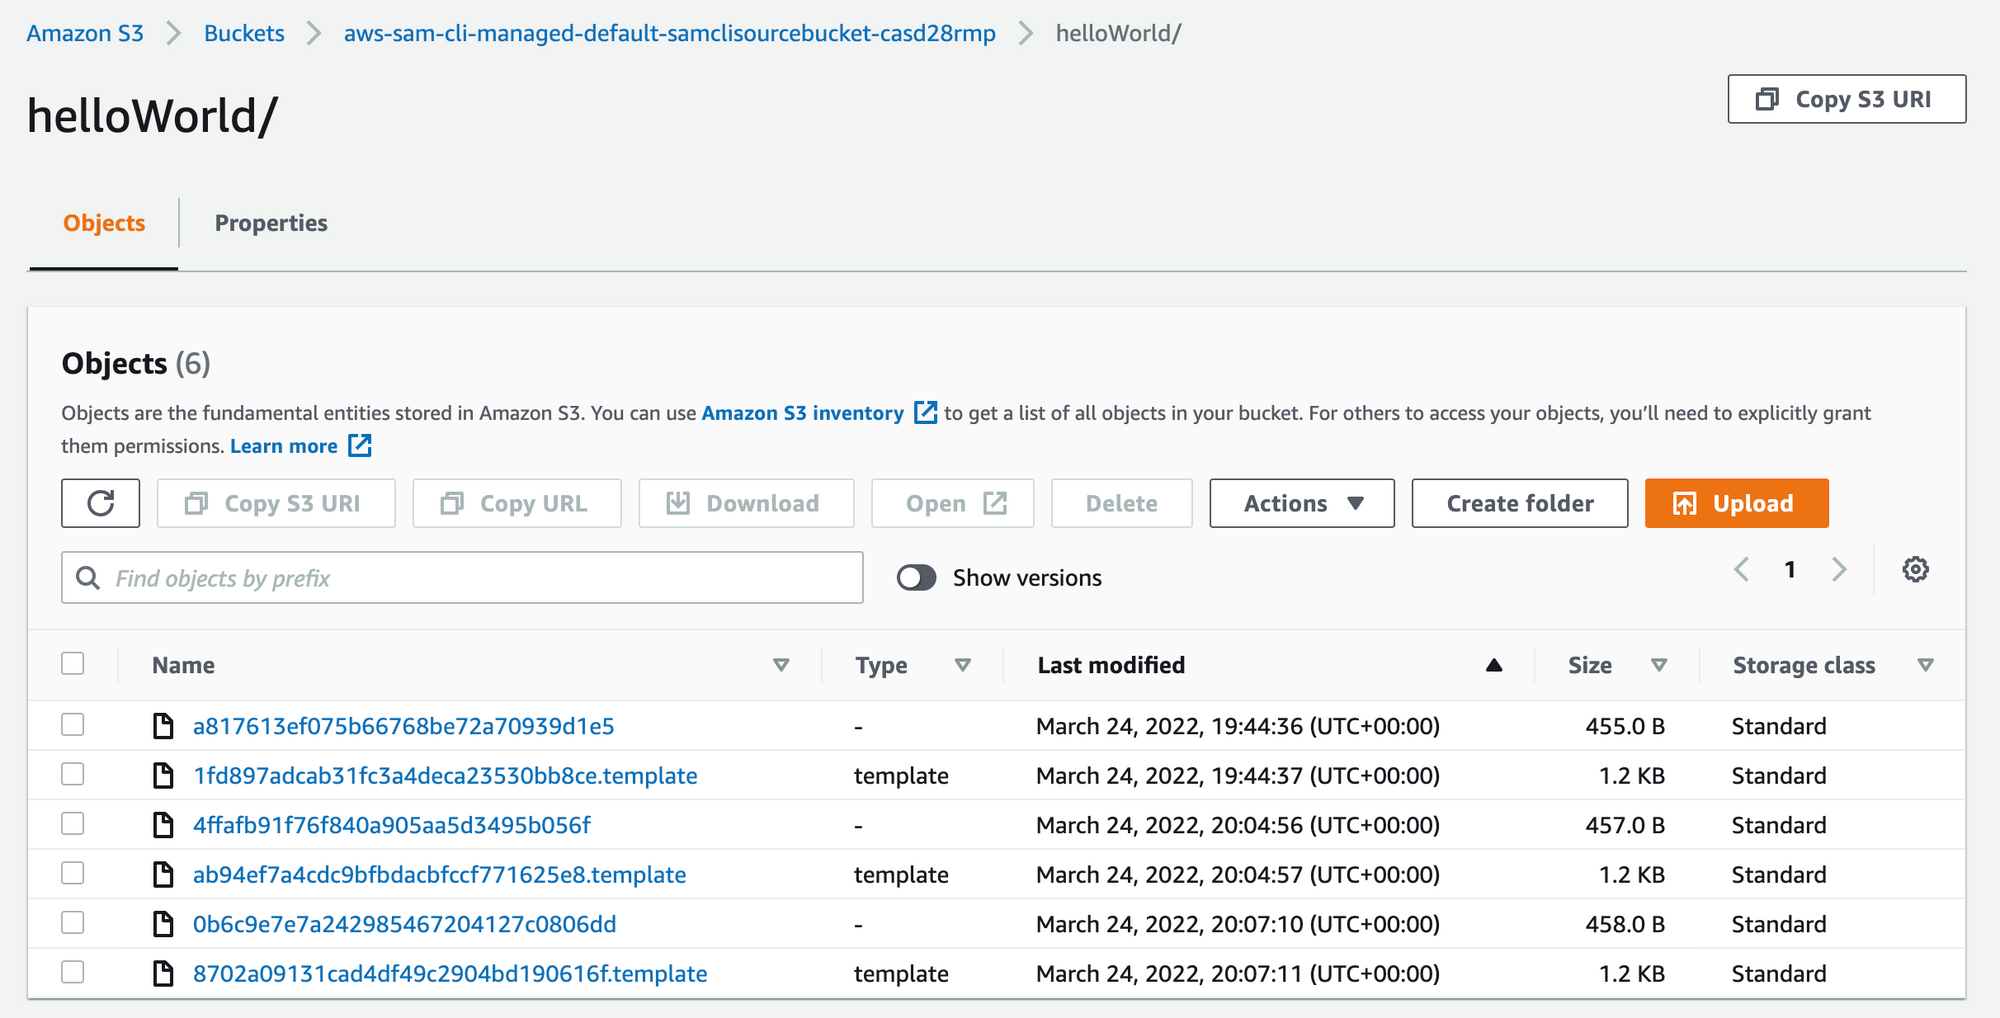
AWS S3
Similarly, AWS SAM also makes use of AWS S3 to store some artefacts required to facilitate the deployment of the serverless application. Again, this is out of scope to what this post is trying to achieve, but the more you use and build serverless applications using AWS SAM, the more you will be introduced to these additional concepts. You will notice a S3 bucket which contains the artefacts used during deployment of the Lambda.
Cleanup
When we created the AWS Lambda function manually with the API Gateway as the trigger during part one, we had to delete those AWS resources manually.
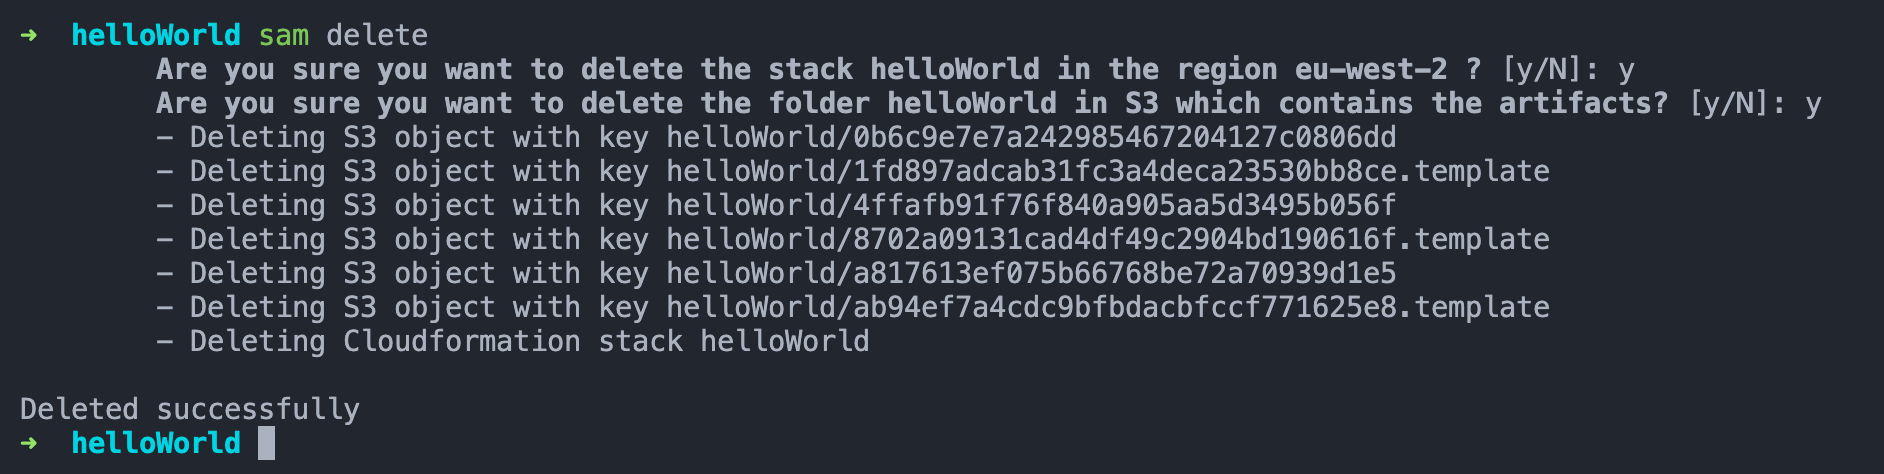
Because AWS SAM essentially makes use of AWS CloudFormation, we can initiate the removal of the CloudFormation stack using the sam delete command. This will remove all of the associated AWS resources for the serverless application we created and deployed using AWS SAM.
Conclusion
After following along with the 2 part tutorial, you should have a basic understanding of AWS Lambda and how a development environment may look like. Developing serverless applications goes much deeper than what has been covered here, but the idea of this tutorial was to provide you with the most basic foundation to develop further on.
I had a lot of fun learning about the AWS Lambda ecosystem and I am excited about this technology!
If you enjoyed the post, please consider to subscribe so that you receive future content in your inbox :)
Psssst, worried about sharing your email address and would rather want to hide it? Consider using a service I created to help with that: mailphantom.io
Also, if you have any questions, comments, or suggestions please feel free to Contact Me.